

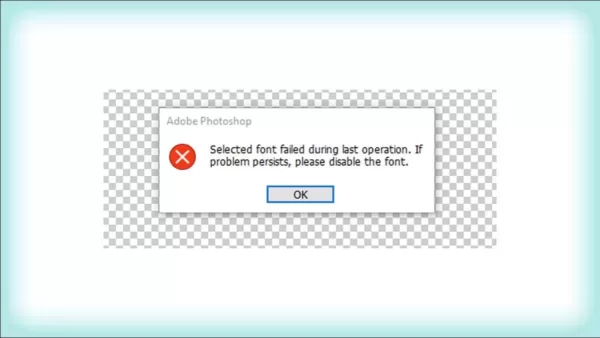
“Selected font failed during last operation. If the problem persists, please disable the font.”
Why is it that 80% of my problems with Adobe products, whether Photoshop or Illustrator, are related to fonts? This error kicked my butt for weeks. It didn’t matter what font I picked, I got the same error for any and all fonts.
My Adobe Font Solution
This is what fixed my “font failed” error. The trick is finding the font that is corrupt and here’s how I picked out the problem font. In any of the typography tools just use the dropdown and preview the list of fonts. Look for the ones that don’t display any representative characters next to the name. Some fonts just don’t display this but it is very rare.

Adobe Fonts
Disable / Enable
Open the “Creative Cloud Desktop” app and select the Font icon at the top right. Find your font in the list, but don’t use the search field because that is only for searching Adobe as a whole and not specific to searching the fonts, you have to scroll until you find it. Select it and click on the toggle switch once to disable, wait for it to notify you that this has happened, then click the toggle switch again to enable it.

In my situation I find that I have to do this for “Myriad Pro” often. Why that font? I don’t know, I never use it, but I have to keep it because others do use it and so for compatibility with the work of others, I keep it.
Authoring with Type 1 fonts disabled in Adobe apps after January 2023
We have arrived already, but heres the most recent announcement: Last updated on Jan 27, 2023
Type 1 fonts (also known as PostScript, PS1, T1, Adobe Type 1, Multiple Master, or MM) are a format within the font industry that has been replaced by formats that can support larger glyph sets.
Most browsers and mobile OSes do not support Type 1 fonts. Similarly to Adobe, most operating systems will likely move forward with support for the more robust technical possibilities of OpenType format fonts, ending support for the Type 1 format.
Adobe Font Fix Options
The popular suggestion is to delete the “CT Font Cache” folder, located here “C:\Users\%UserProfile%\AppData\Roaming\Adobe\Adobe Photoshop 2021\CT Font Cache”, if you’re using Photoshop 2021. That can fix a font problem when that font cache is corrupt and seems to be a common problem. That may be all you need to fix your “Selected font failed” error. This however did not work for me.
Adobe has a thorough troubleshooting page for font problems and most of the time one of these options will fix your problem.
Adobe font troubleshooting guide – Troubleshoot fonts
When these recommendations don’t work, chances are you have a corrupt font. If it’s a system or installed font you can replace it through the font manager in Windows, but if it is an Adobe font you have to do it through the Adobe Creative Cloud App.
For Mac, see the options below.
Solutions For Other Font Management
Windows: How To Fix a Corrupt Font in Windows 10
Replacing fonts that are part of the operating system gets a little trickier. I have an article here for replacing fonts in Windows, but not for MAC. Windows is fairly simple, but not so for MAC’s. The version of operating system can make things different, so you might need to search online using the name of your OS version.
So, what about fonts on MAC?
Lifted from “Install or remove fonts on your Mac – Apple Support“
Install or remove fonts on your Mac
Your Mac comes with many built-in fonts, and you can download and install more from Apple and other sources.
macOS supports TrueType (.ttf), Variable TrueType (.ttf), TrueType Collection (.ttc), OpenType (.otf), and OpenType Collection (.ttc) fonts. macOS Mojave or later also supports OpenType-SVG fonts. Legacy suitcase TrueType fonts and PostScript Type 1 LWFN fonts might work but aren’t recommended.
Install fonts
- Double-click the font in the Finder.
- Click Install in the font preview window that opens. The font then appears in the Font Book app, and is available for use in your apps.
Notice
If you want the fonts you install to also be available to other user accounts on your Mac, use Font Book settings to set the default install location.
Download or activate fonts
Open the Font Book app from your Applications folder. In Font Book, any fonts that are deactivated or haven’t been downloaded from Apple are dimmed.
- Select a font that hasn’t been downloaded, then choose Edit > Download.
- Select a font that has been deactivated, then choose Edit > Activate (or Enable). When a font is deactivated, it remains installed but no longer appears in the font menus of your apps. You can deactivate any font that isn’t required by your Mac.
Remove fonts
Open the Font Book app from your Applications folder. You can remove any font that isn’t required by your Mac.
- Select the font.
- Choose File > Remove. Font Book moves the font to the Trash, and the font no longer appears in the font menus of your apps.
MAC Font Book Reset
This is from Apple, but resets your fonts and does not replace a single corrupt font. I would assume you could reinstall the corrupt font on a MAC which should overwrite it and fix the font issue. See MAC “Install Fonts” instructions right above this section.
You can restore the fonts that were originally included with your Mac. If you’re having issues with Font Book, this may be a useful solution. Keep in mind that resetting the standard fonts will move any fonts you’ve installed into a separate folder, making them unavailable for use in apps. Here’s how to do it:
- In the Font Book app on your Mac, choose Font Book > Settings.
- Click Advanced, then click Reset Fonts.
- Click Proceed to confirm and enter your password if prompted (or use Touch ID).
Note on Font Book Reset
Any fonts you’ve installed will be moved to /Library/Fonts (Removed) or ~/Library/Fonts (Removed). To install those fonts again, simply reinstall them.
Here’s the link to Apple support for Font Reset:
Restore fonts that came with your Mac using Font Book – Apple Support
Related Noogies


- About the Author
- Latest Posts

Professional geek and early implementer of virtualization in 1998.
Small business owner and was once the network admin for Knight Transportation. Racquetball fanatic, but had to retire from it.
Business, Technical, and Administrative Professional of Web Design, SEO, SSO, UX/UI, Networked Systems, and Virtualization with more than 20 years of experience.